
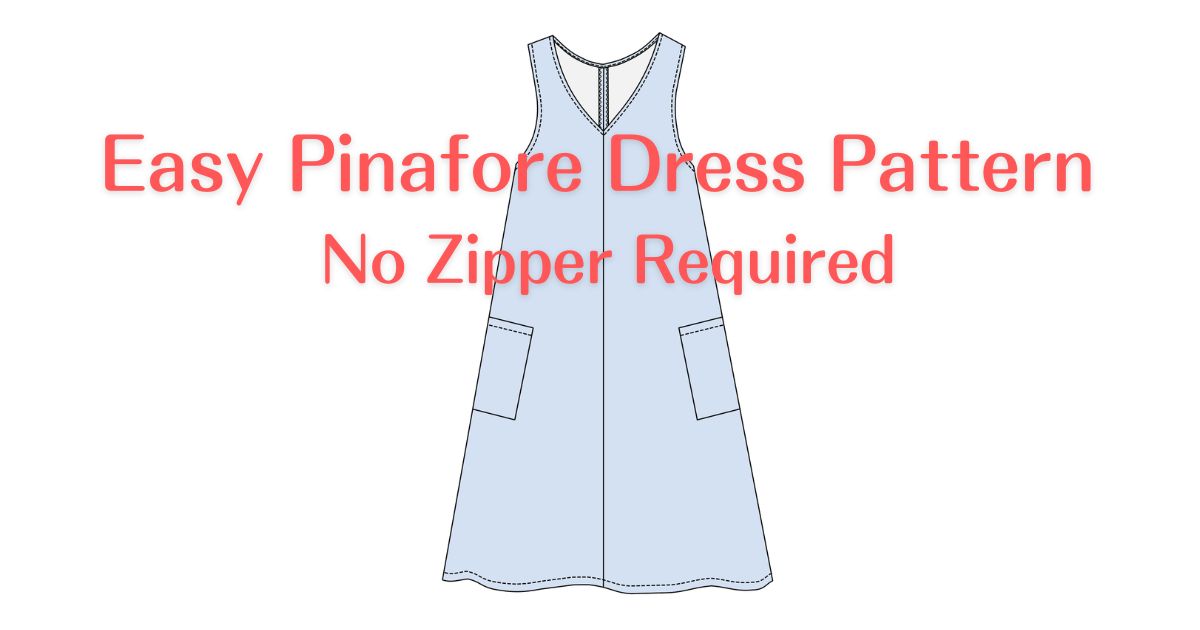
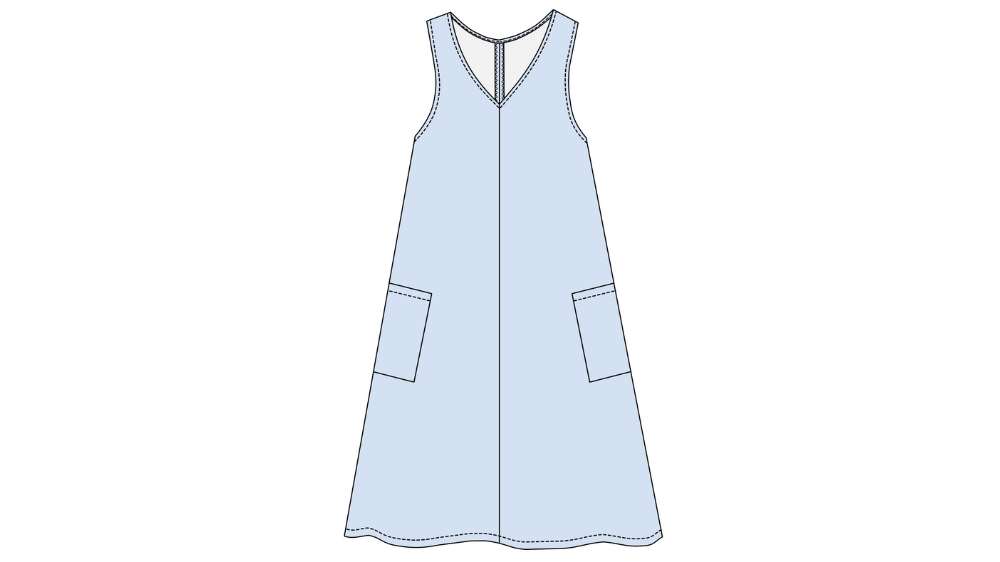
A pinafore dress is a sleeveless dress with a low neckline and wide armholes, designed to be worn over a blouse, T-shirt, or other top.
Depending on the fabric and what you wear underneath, you can enjoy this style throughout different seasons.
In this tutorial, I’ll show you how to draft and sew a simple pinafore dress.
This design does not require a zipper, making it a relatively simple project to sew.
Prepare the Pattern
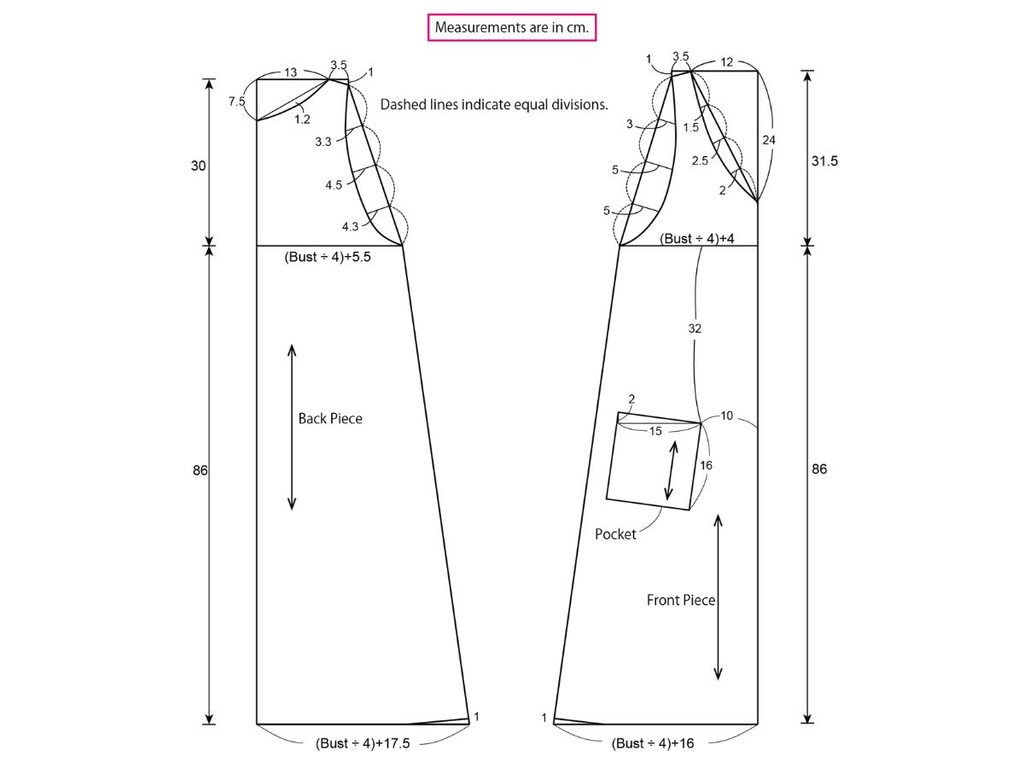
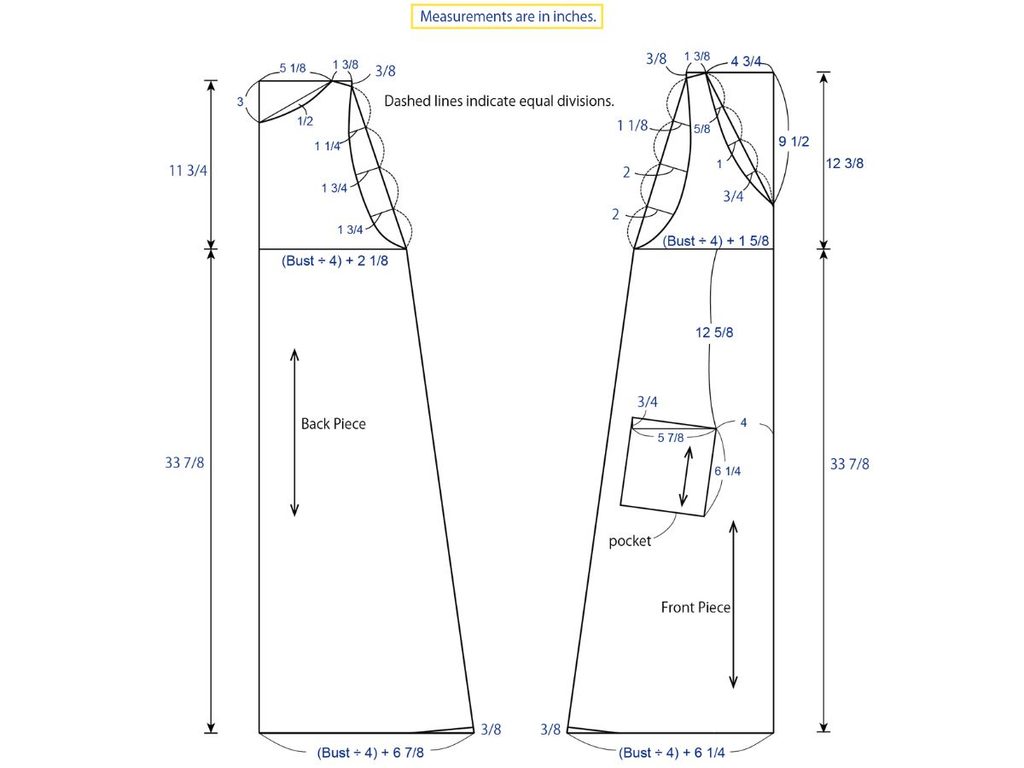
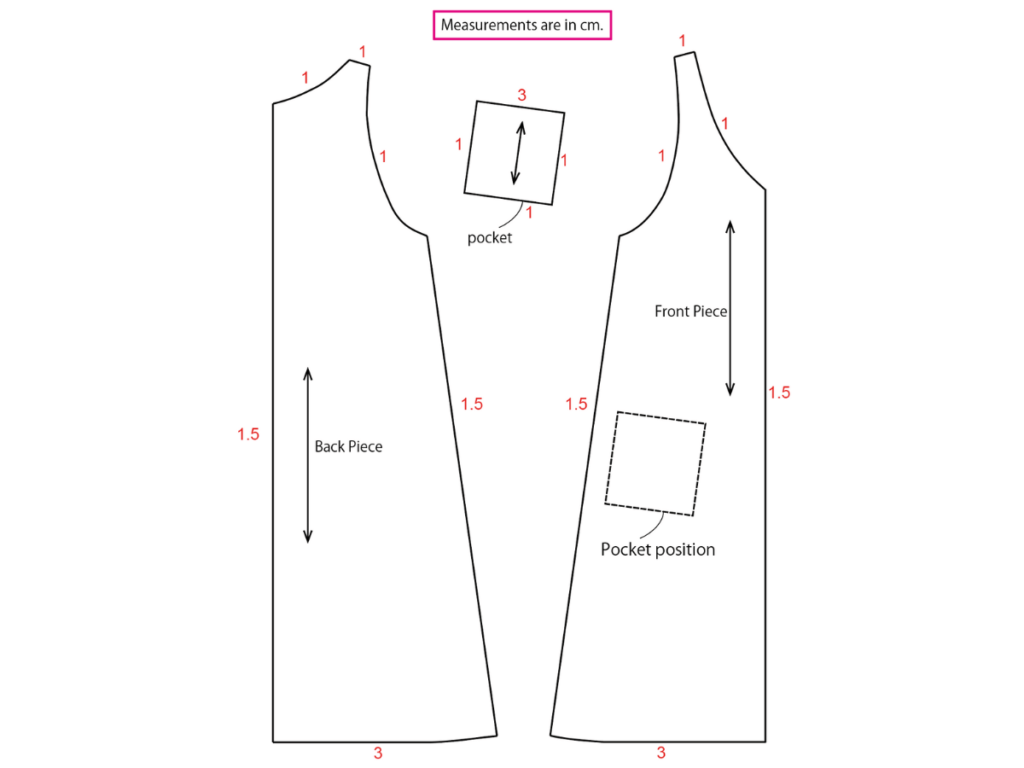
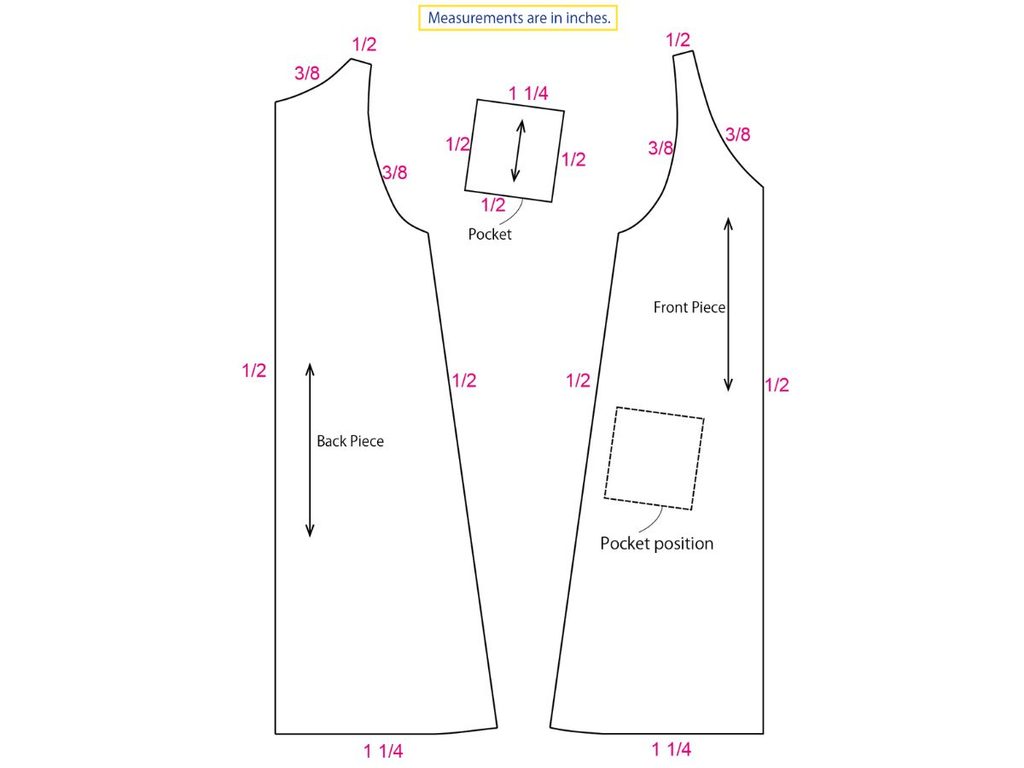
Draft the pattern using the diagram below.
The pattern is provided in both centimeters and inches, so you can use whichever measurements are more convenient for you.
Use your bust measurement for “Bust” and calculate the other measurements accordingly.
Once you have finished drafting the pattern, trace the pocket onto a separate sheet of paper to make the pocket pattern.
Next, add the seam allowances.
The red measurements in the diagrams below indicate the seam allowances to add.
Once the seam allowances have been added, cut out the pattern pieces.
Prepare the Sewing Materials
Fabric
You will need approximately 2.5 m (2¾ yd) of 110 cm (43 in) wide fabric.
Thread
Choose sewing thread that matches your fabric.
If you are finishing the seam allowances with a three-thread overlocker (serger), you will also need thread for the overlocker.
Bias Tape
The neckline and armholes are finished with bias tape on the inside.
Prepare 12.7 mm (½ in) double-fold bias tape.
If you are making your own bias tape, cut bias strips approximately 2.5 cm (1 in) wide.
Cutting the Fabric
Fold the fabric in half lengthwise, with the grainline parallel to the selvage, and arrange the pattern pieces on the fabric.
Cut out all the pieces according to the pattern.
For this design, the center front and center back are seamed rather than cut on the fold, so be careful when laying out the pattern pieces.
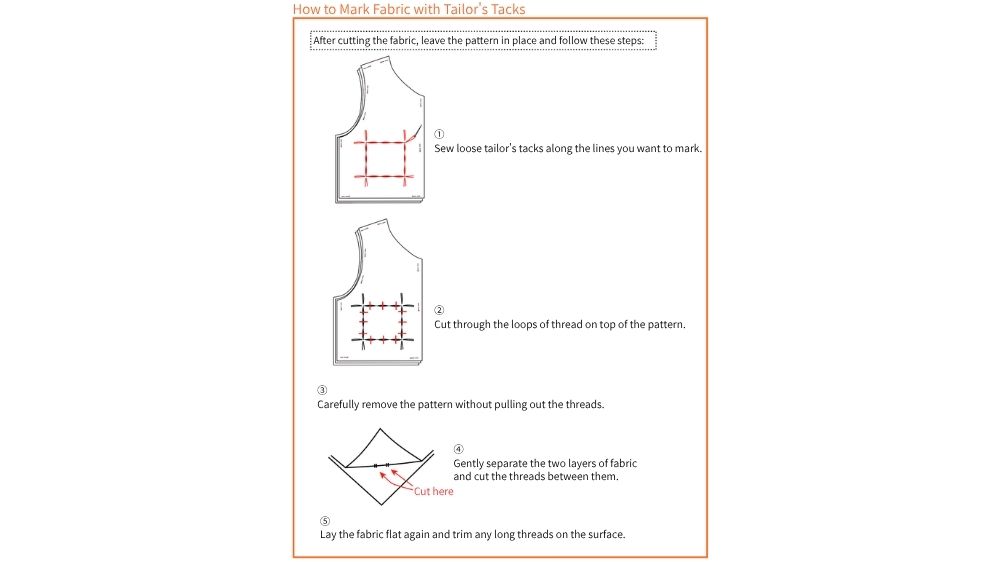
After cutting, mark the pocket placement on the front pieces with basting thread.
Sewing Steps
1. Sew the Pockets
Double-fold the upper edge of each pocket and stitch it in place.
Press the seam allowances around the remaining edges of the pocket to the wrong side.
Position the pockets on the front pieces using the markings as a guide, then topstitch them in place.
2. Sew the Center Front and Center Back Seams
Place the front pieces right sides together and stitch the center front seam.
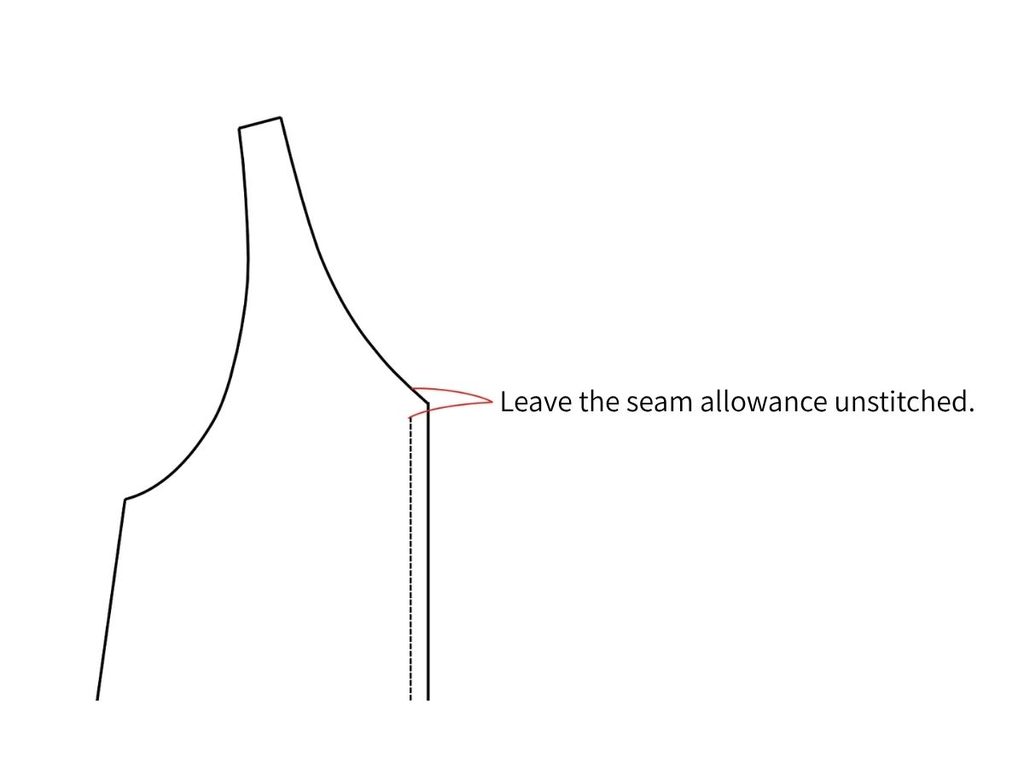
At the V-shaped point at the top of the center front, stop stitching before reaching the edge, leaving the seam allowance unstitched. This will make it easier to finish the neckline later.
In the same way, place the back pieces right sides together and stitch the center back seam.
Finish the seam allowances separately with an overlocker (serger), then press the seam open.
3. Sew the Shoulder and Side Seams
Place the front and back right sides together.
Stitch the shoulder seams and side seams.
Finish the seam allowances together with an overlocker (serger), then press them toward the back.
4. Finish the Hem
Double-fold the hem to the wrong side and press.
Stitch around the hem to secure it.
5. Finish the Armholes
Finish the armhole edges with bias tape.
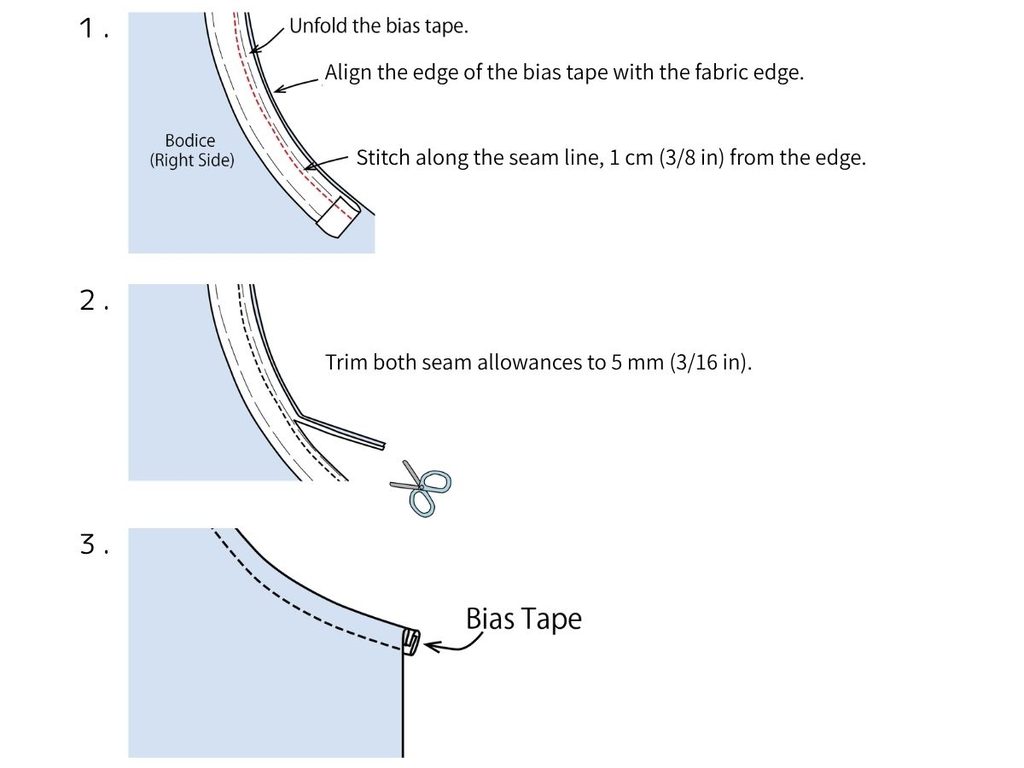
6. Finish the Neckline
Finish the neckline edge with bias tape.
Because the center front forms a relatively deep V, I recommend starting the bias tape at the center front and working your way around the neckline.
Closing Thoughts
When drafting a pattern like this, it can be helpful to begin by drawing the main vertical and horizontal guidelines, then use them as reference points for the rest of the pattern.
This simple pinafore dress can look quite different depending on the fabric you choose, making it easy to adapt for different seasons.
When finishing the neckline and armholes with bias tape, I prefer to baste the tape in place by hand before machine stitching. It takes a little more time, but it helps achieve a neat finish.
I hope you enjoy making your own pinafore dress!

