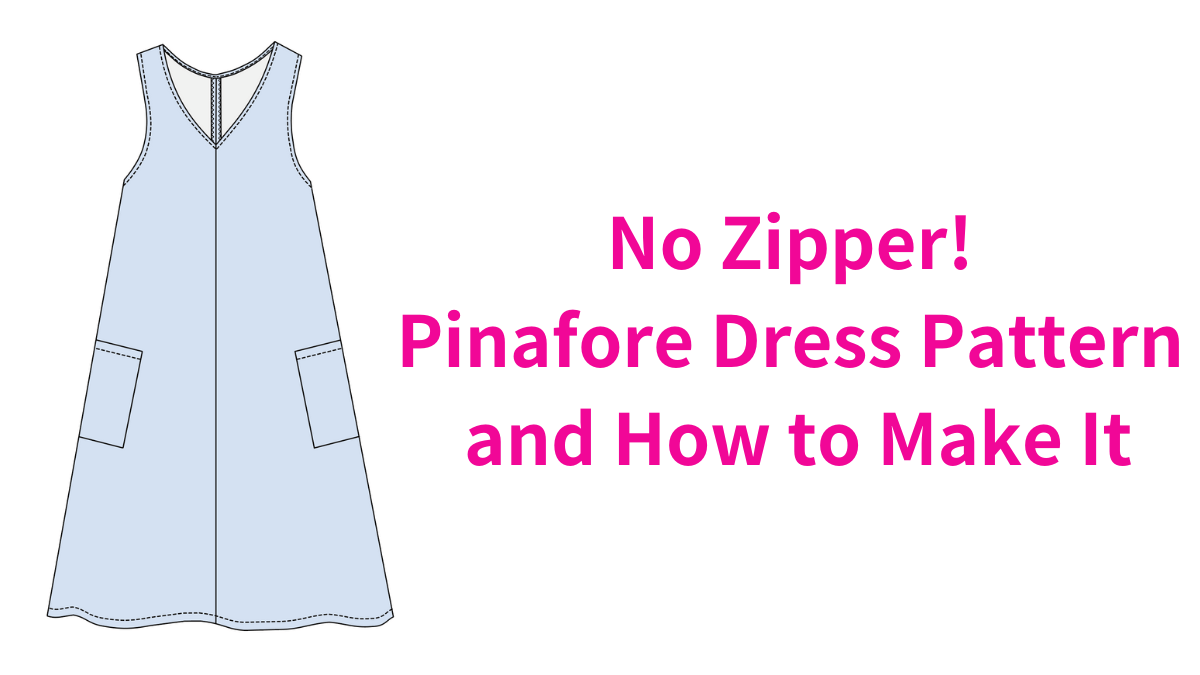
A pinafore dress is a garment where the bodice and skirt are connected as one piece. It typically features a wide opening around the neckline and armholes.
You can enjoy layering it with blouses, T-shirts, or even a turtleneck sweater in winter. In this article, I’ll show you how to make a pinafore dress.
Since there is no zipper involved, I think it’s easier for beginners to try.
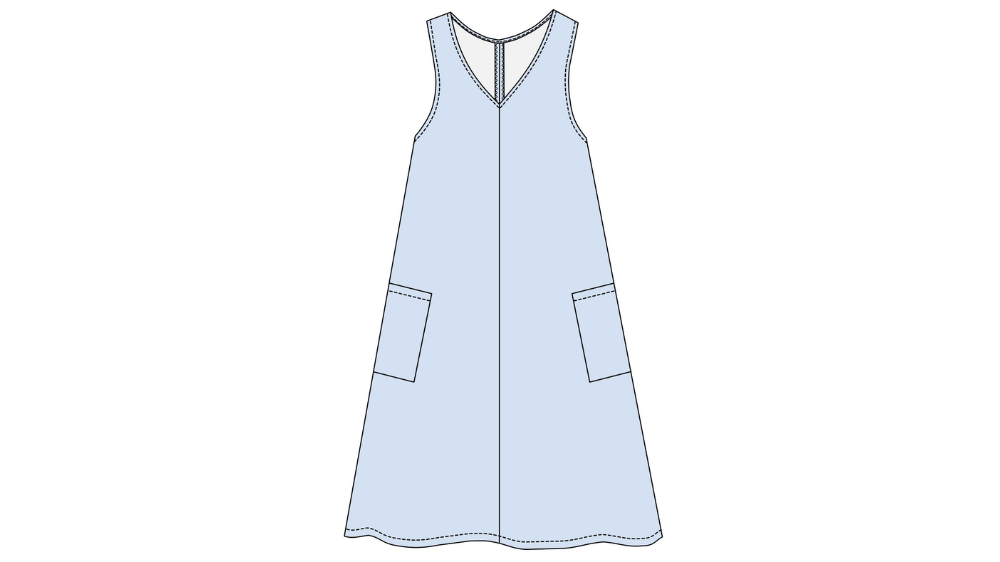
Prepare the pattern
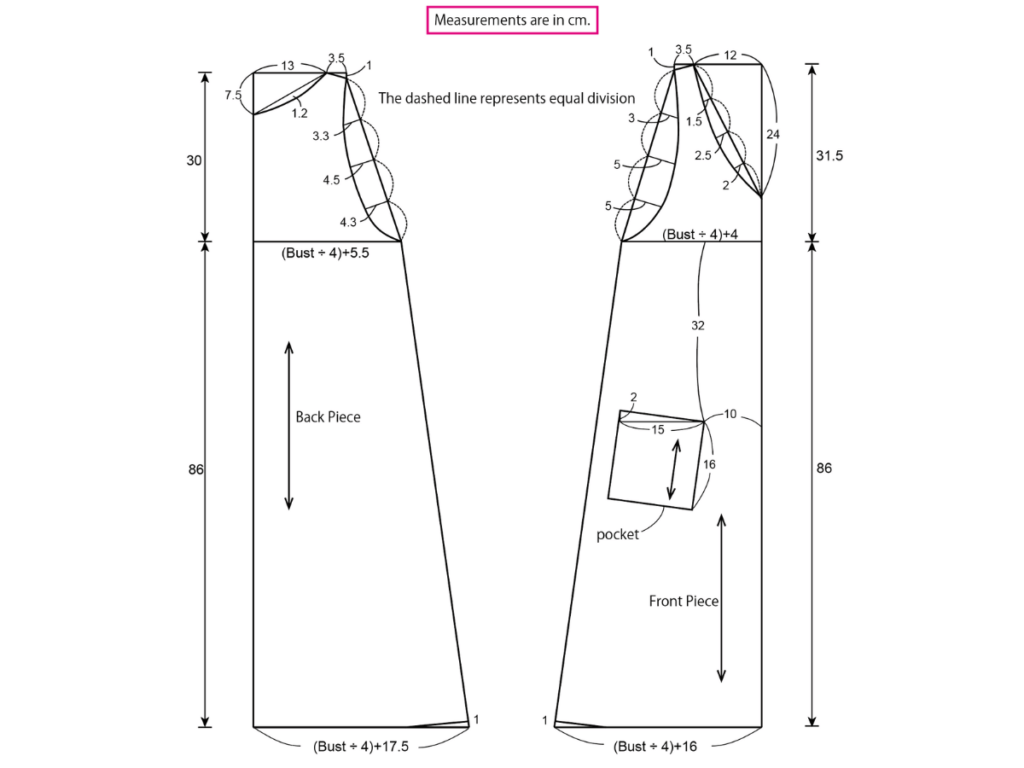
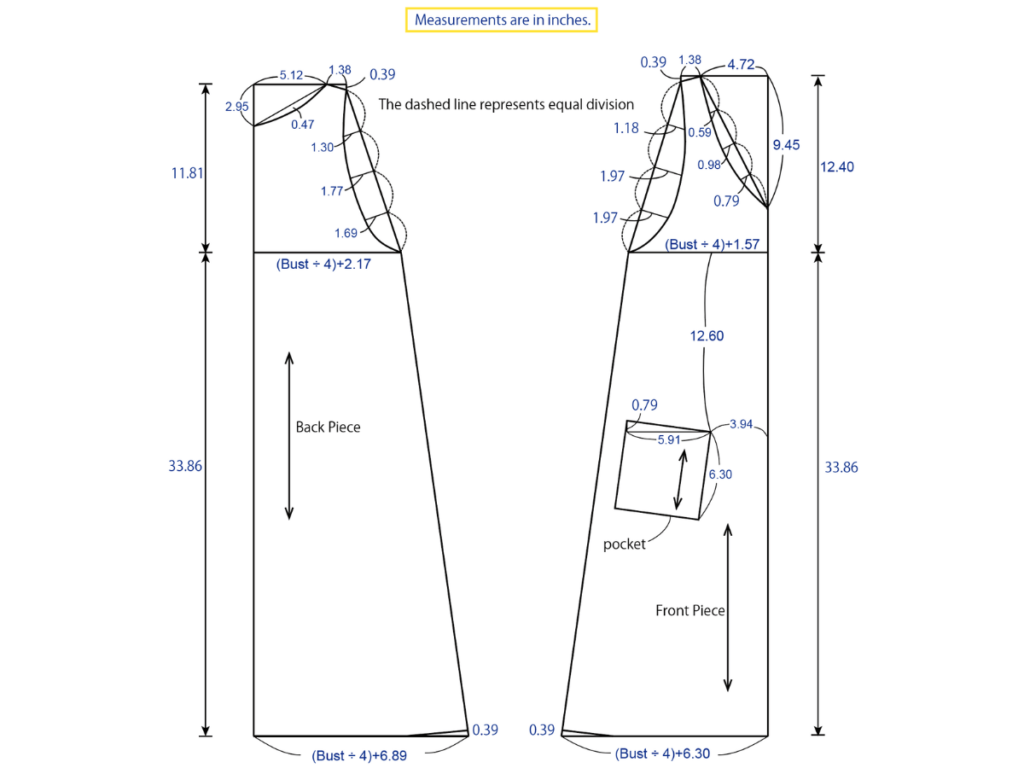
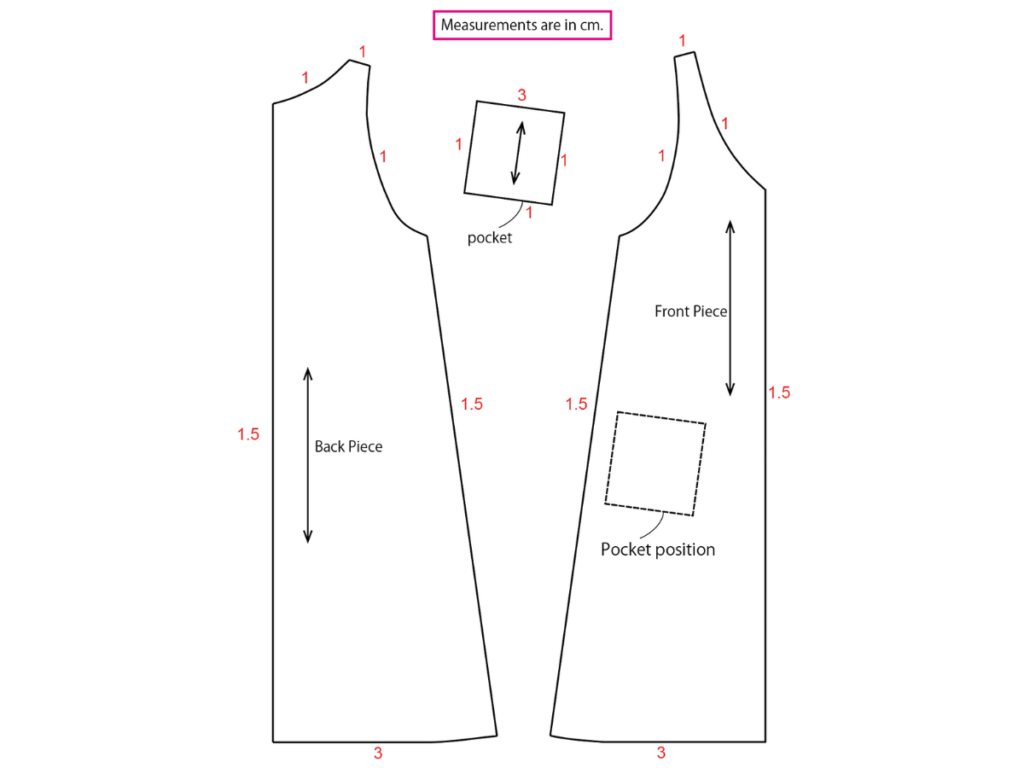
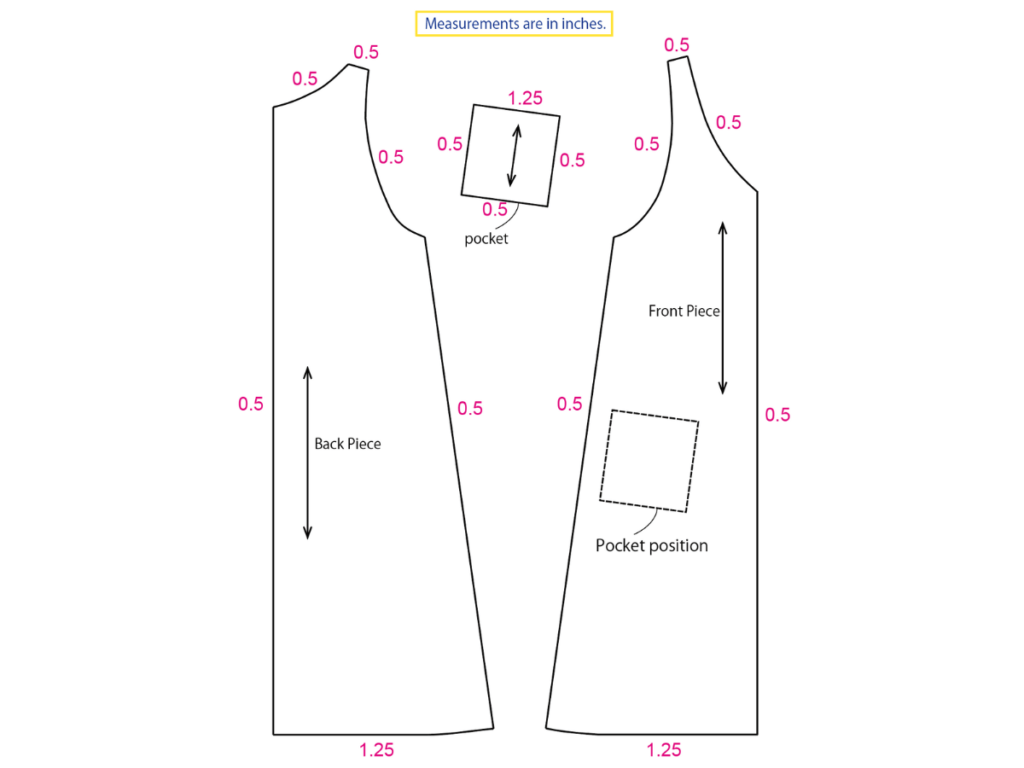
The pattern is as shown in the diagram below. There are diagrams using both cm and inches as units, so please refer to the one that is easier for you to understand.
Please substitute your bust measurement for B and calculate accordingly.
Once the entire pattern is drafted, trace the pocket onto a separate sheet of paper and create the pocket pattern.
Next, add the seam allowance.
The red text in the diagram below indicates the required seam allowance. Add the seam allowance and then cut out the pattern.
Prepare the sewing materials
1. Fabric: Prepare 2.5 meters of fabric with a width of 110 cm.
2. Sewing thread: Prepare sewing thread to match the fabric. Also, prepare three threads for the overlocker.
3. Bias tape: The neckline and armholes will be finished with bias tape on the inside. Prepare a double-fold bias tape with a width of 12.7 mm.
If you are making your own bias tape, a width of about 2.5 cm is recommended.
Fabric cutting
Fold the fabric in half lengthwise, aligning the grainline with the fabric’s vertical threads, and place the pattern on top.
Please cut according to the pattern.
In this design, the front center and back center are not placed on the fold, so please be careful.
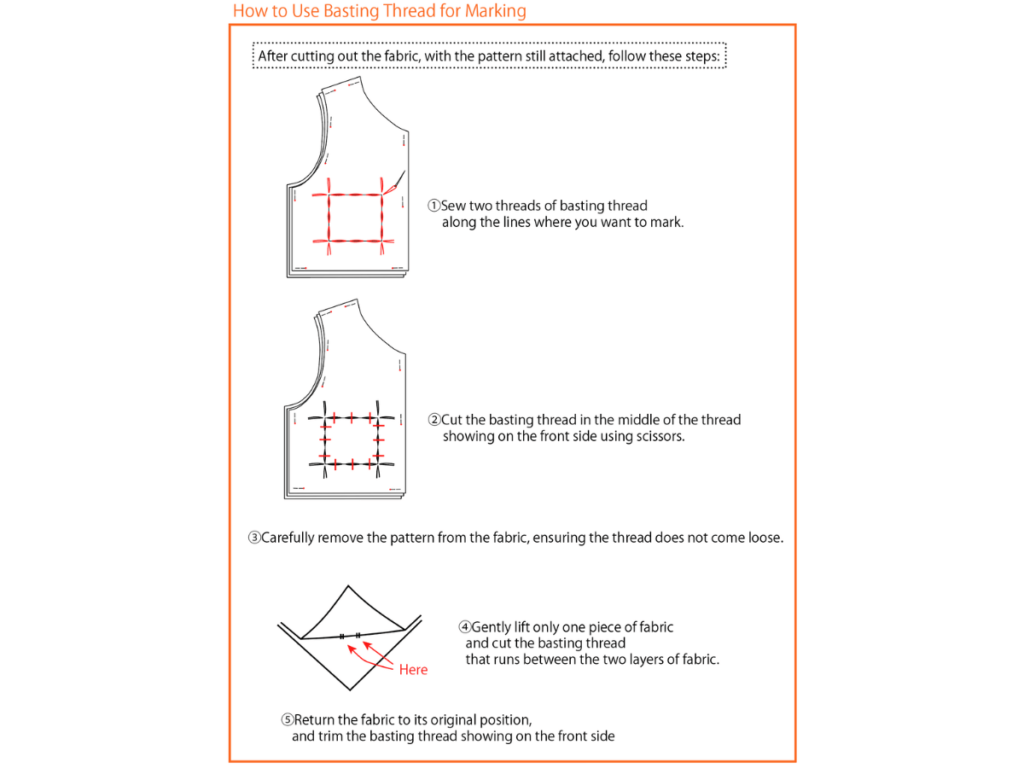
After cutting, use basting thread to mark the pocket placement on the front bodice.
Sewing steps
1.Fold the pocket opening into thirds and stitch it with a sewing machine. Fold the seam allowances around the edges of the pocket and press them with an iron. Place the pocket on the marked placement on the front bodice and sew it in place with a sewing machine.
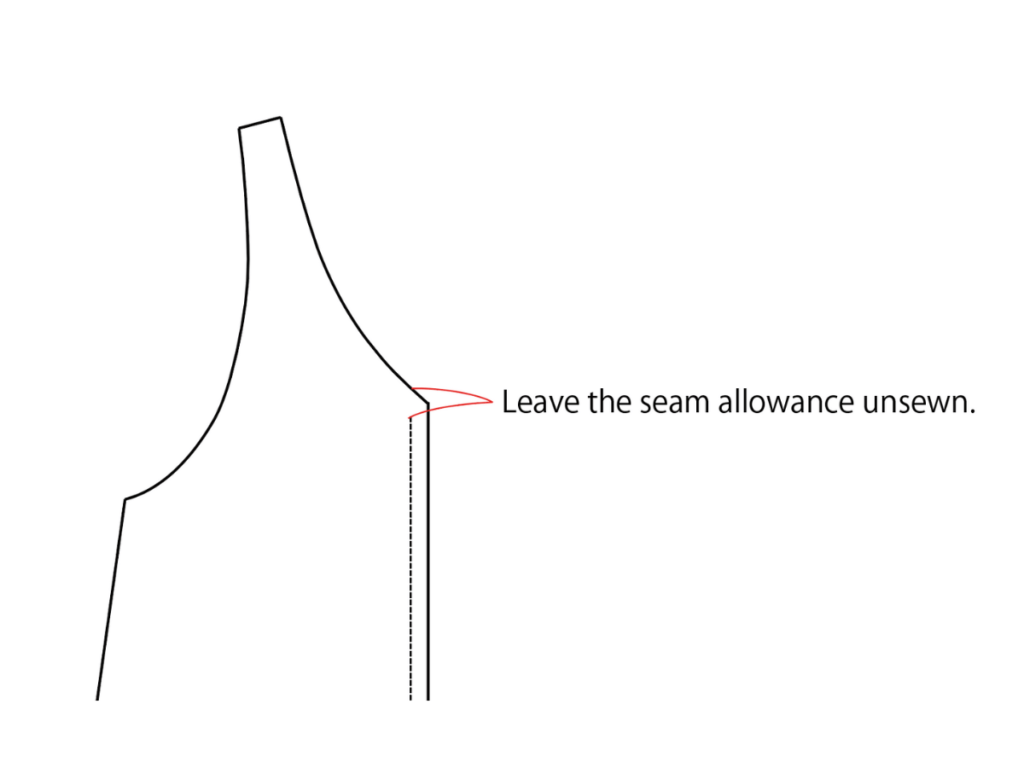
2.Place the front bodice pieces right sides together and sew along the front center with a sewing machine. At the V-shaped center point, stop sewing before reaching the edge, leaving the seam allowance unsewn. This will make it easier to handle later.
In the same way, place the back bodice pieces right sides together and sew along the back center with a sewing machine. After sewing, finish the seam allowances separately with a serger and press them open with an iron.
3.Place the front and back bodice pieces right sides together and sew along the shoulder seams and side seams. Finish the seam allowances together with a serger and press them toward the back with an iron.
4.Fold the hem into thirds and sew it with a sewing machine.
5.Finish the armhole seam allowances with bias tape.
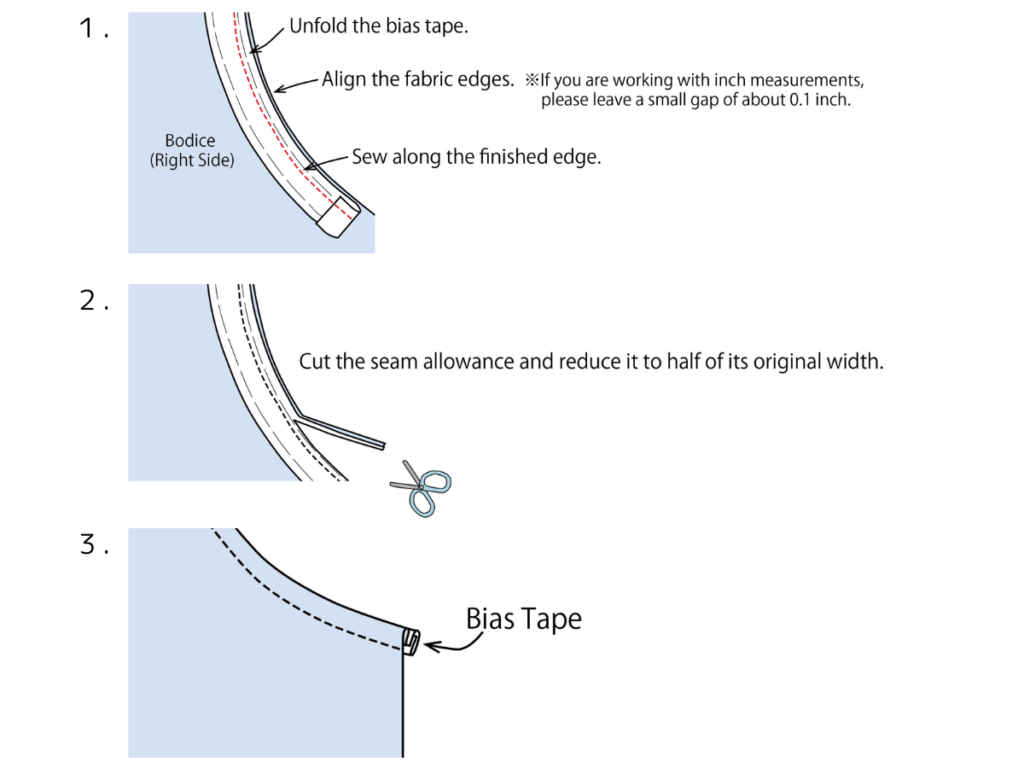
6.Finish the neckline seam allowances with bias tape.
The front center has a slightly deeper V-shape, so it is recommended to start the bias tape from the front center and sew it all the way around.
Closing Thoughts
When creating a pattern, it’s helpful to first draw the vertical and horizontal lines and use them as a reference to build the rest of the design.
By changing the fabric, I believe you can enjoy it in different seasons.
When finishing with bias tape, I think it’s best to first baste with hand stitching and then sew with the machine for a neat finish.
Please give it a try and make it!
